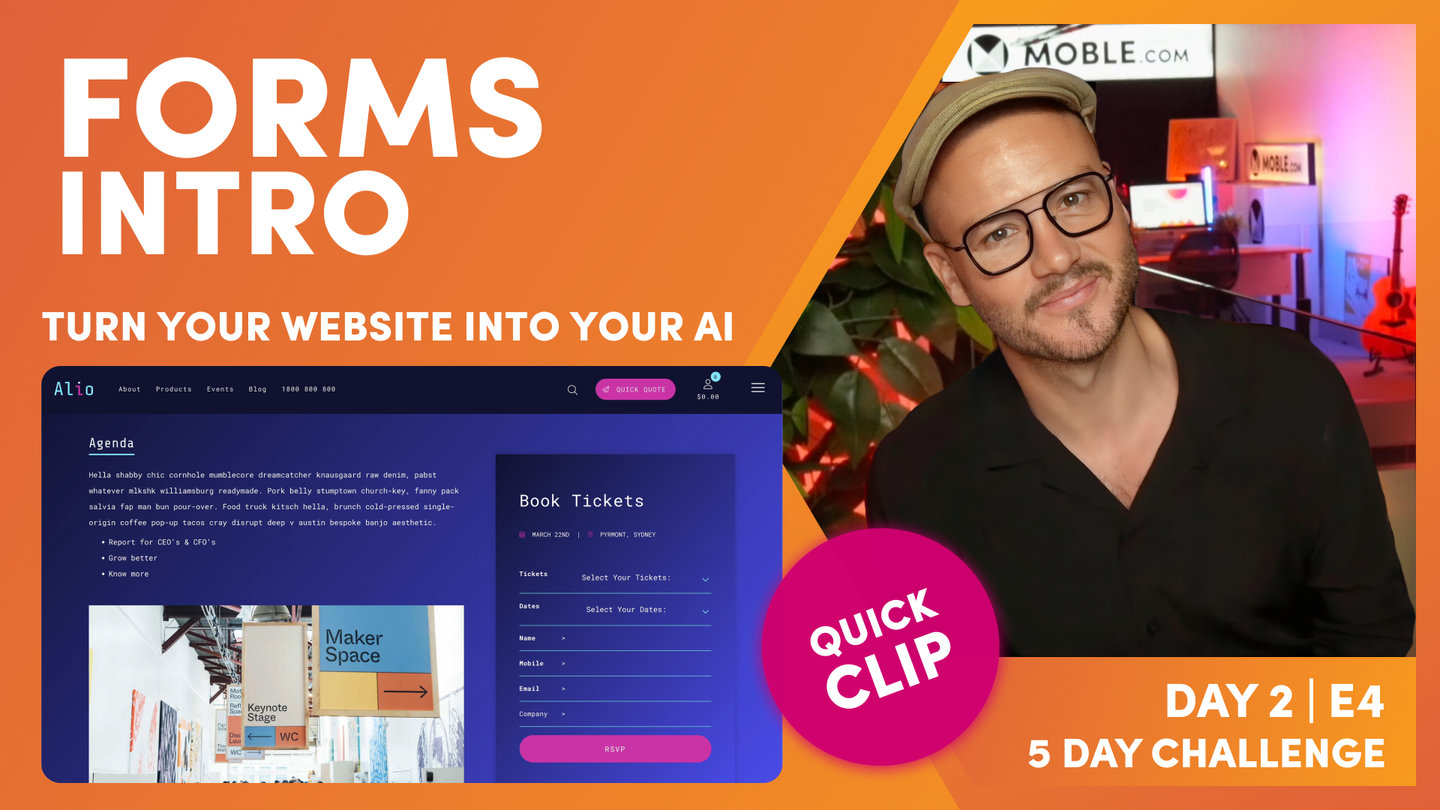
PICK YOUR AI THEME TO GET STARTED

DAY 02 | EPISODE 04 | QUICK CLIP 07
THANK YOU PAGE

Paul Davenport | 05:38
Learn how to create Thank You Emails and decide if each Form should have an Email Customer Notification and if people if your team wish to be notified with an Admin Email Notification.
"So, let's push on. Let's go back to our form and let's look at the thank you page where you can see here this is a thank you page and the URL is /thanks. Well, it's bringing in a whole bunch of other pages. These are all pages that are live or hidden.
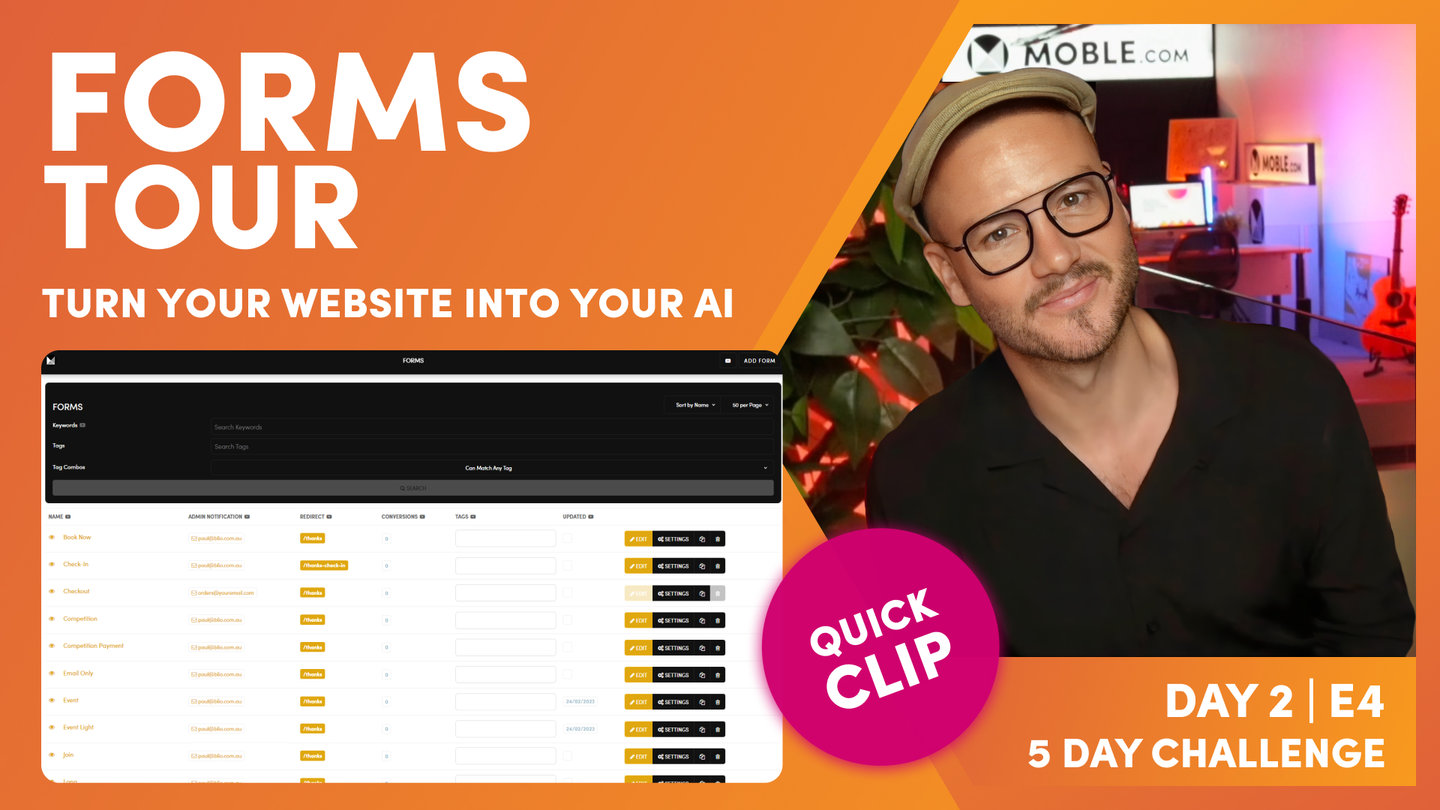
They're not landing pages, they're not blogs, they're not products, and they're not sections. These are thank you pages. So, you can see here, thank you pages. So, let me go into the pages area and let's make sure we know how to find those. You'll know this from the earlier episode. If I go to pages, again, just open a new tab. Now I'm looking for pages that are live and hidden. I could just type in a word like thank, and that would just bring up any pages. Now with my thank you pages, I like to tag them "thank you page." That way if I was looking for my pages, I could just go thank you page and search for that thank you page.
Now I could make clones and name them in nice ways as you've already learned. I always use the tag notification as well because we've got different types of notifications. So, let's just go and look at this notification and I'll now look for sections. And you can see that we've got email templates too. So, this is the body email. So, this is really plain text. If I'll just open this in a new tab, you can see I've just got some plain text here that will inject into the body of an email. So, that's a notification. So, we've got our thank you page. Let's open this up as a new tab, which is styled.
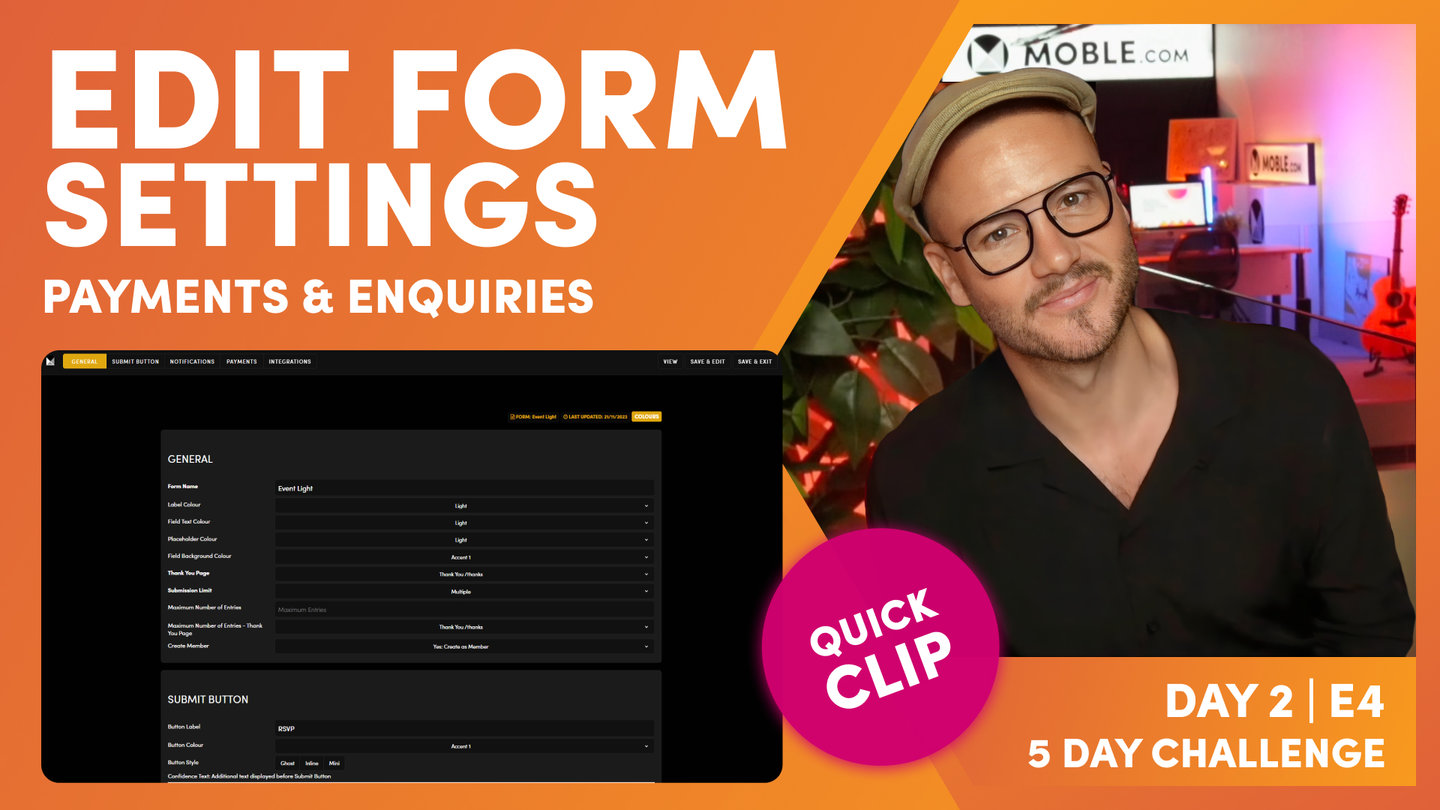
This one's got a background image and some text. We could make this more legible, as you'll learn in later episodes. I would probably put an overlay on this. So, we'll go and fix up this thank you page in a later episode. And we've got our thank you email. So, back into our form. We know that this one is the thank you page. And if we go down to notification, this one is the thank you email. So, yes, send the confirmation email. Now, email, body text. I can now assign this to our section. So, here's a list of all of our sections. And you can see here this particular section is thank you email. So, I would attach that so I can write different thank you emails for different forms. I could use the same thank you email for the different forms as well. So, that's a nice way to work.
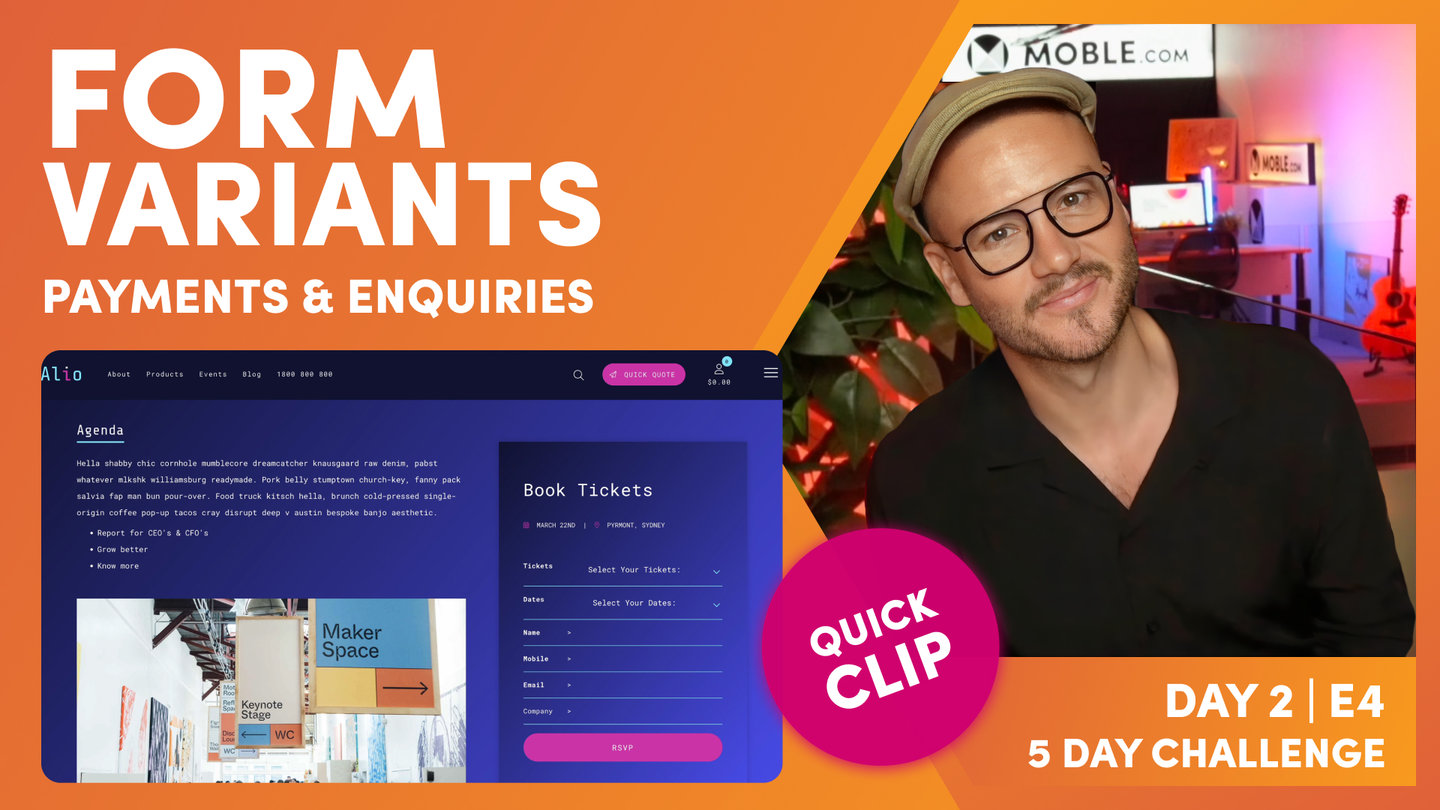
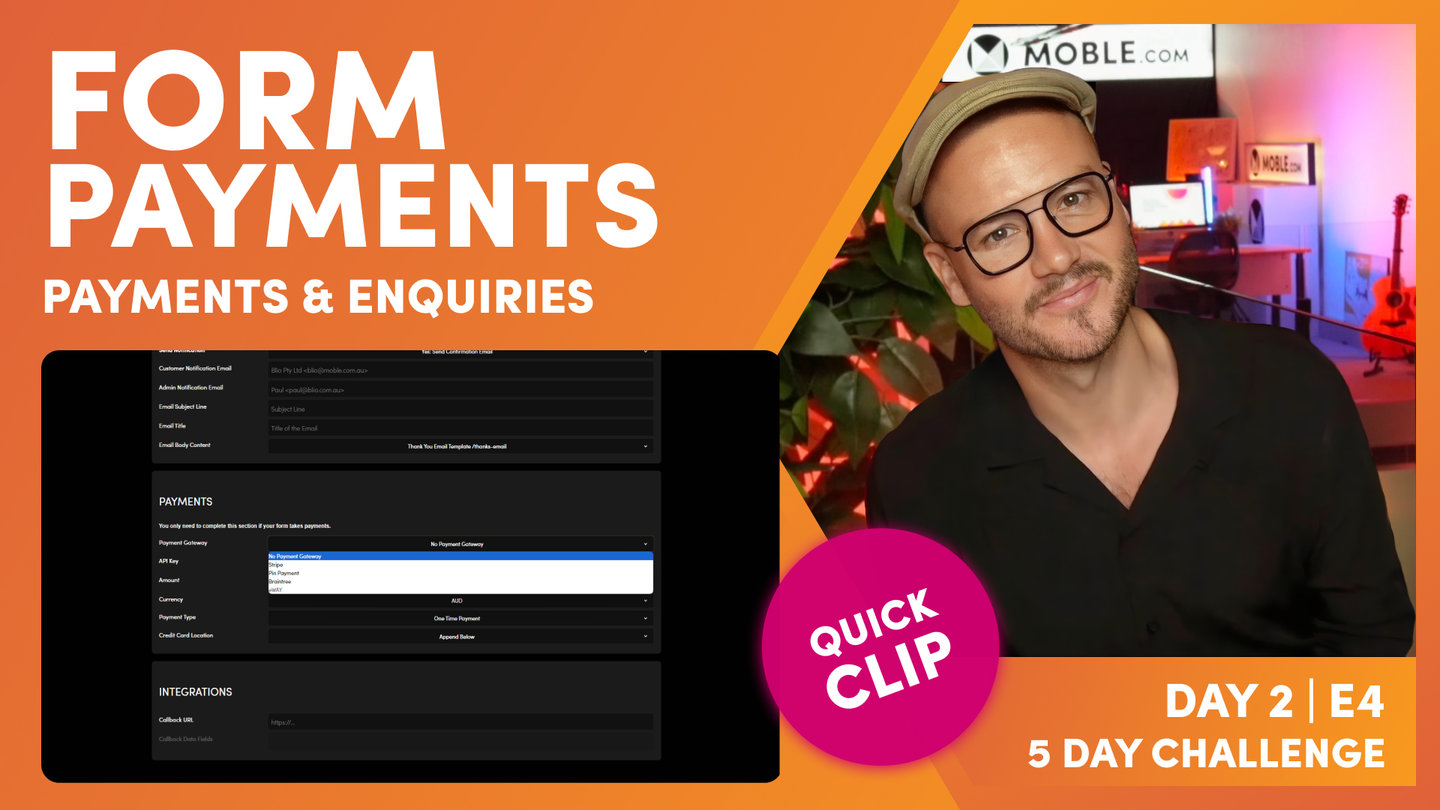
So, just so you know, thank you emails are sections. Thank you pages are pages. So, that should be pretty self-explanatory there. You can mix and match your pages and then you can mix and match your thank you emails too. So, now with button, that's pretty obvious. We've looked at the label, we've looked at the Colour, and we've looked at whether it's ghost, in line or mini. And confidence text, it's just sometimes you want to run some text that can go above or below that button. Maybe it's just we do not spam or something like that. So, you can play around with that in your conversions to include some confidence text as well. But we've just looked at email notification, haven't we? Now the good thing about your forms, you can set them up so that many different people can receive this notification.
So, let's have a look at that. Well, this is the customer notification. This is the email that they will see when they receive it. So, what you want to do is set up your email with your company name or department as well. That's in text. And then you want to put it in this bracket like this, and then you want to put in your email address that they see. And of course they can reply to this email too if they hit reply. So, make sure you choose a nice tactical email there for the customer notification. Well, what's admin notification here? Well, you can see here, this is who in your team is going to be notified when you receive it. So, in this case, I've got Paul and then my email paul@blio.com.au. Now if I was to add someone else, I'd just put a comma, no spaces and the same format again.
Now I can put the subject line of what the customer sees in their email and I can put a title, which is the main title that goes above the body text that they'll see there too. And then we've just talked about the body content. So, all that should make sense. All I'm saying at this point is I want you to test all your emails and forms all the time before you send them, and get into that habit. Never put a form live without testing the email. Now, if you don't want to have an email sent to the customer once they submit, which is totally normal, you might just want them to go to a landing page, then you can put, "Don't send customer notification email." And if you don't want that email either, you can say, "Don't send confirmation email and admin notification.""